Human Resources often sends a list of employees to each manager, for example, to collect evaluations.
In doing so, we store a file for each organization in a folder and ask them to input the information.
The tool introduced here is a tool to create a file for each organization.
Please watch the following movie(Speaking in Japanese)
目次
- What is the “File Splitting Tool”?
- Download link
- How to use the File Splitting Tool
- 1.Prepare the file to be split
- 2.Enter the “Original Data File Path” on the Setting sheet
- 3.Enter the “File appended characters” on the Setting sheet.
- 4.Enter the “Name of the sheet to be split” for the Setting sheet.
- 5.Enter the “sheet name after splitting” for the Setting sheet.
- 6.Enter the “Destination Folder” for the Setting sheet.
- 7.Click the “Split File” button.
- 8.Check the “Result” sheet.
- About Options
- Common Errors
- in the end
- Update History
What is the “File Splitting Tool”?
This tool is used when you want to split files by group within a list.
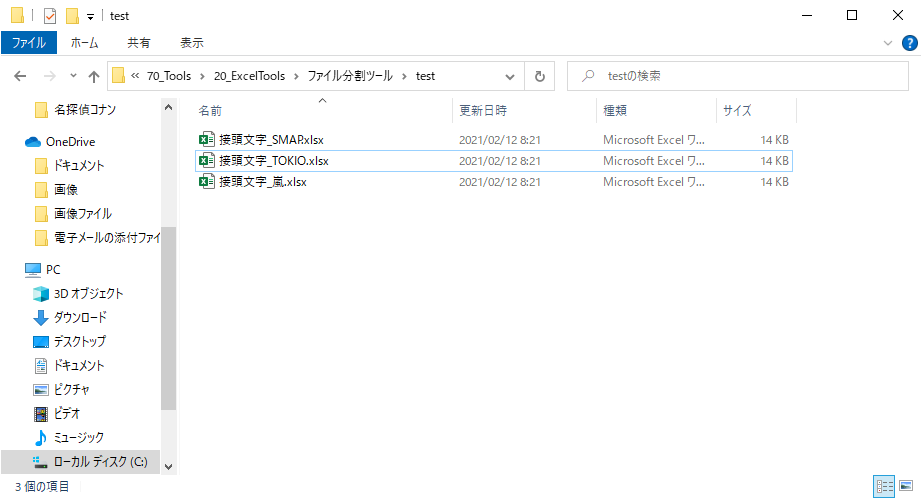
The folder where the created files are stored is shown below.
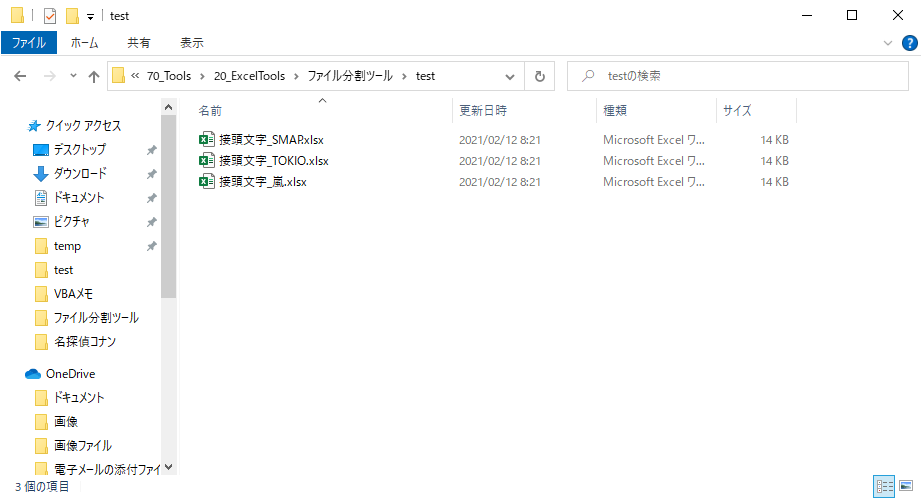
The reason for the prefix _ in the file name is discussed below. Here we have verified that the files are correctly divided into groups.
Download link
Please download the tool after click the following link and use the tool.
How to use the File Splitting Tool
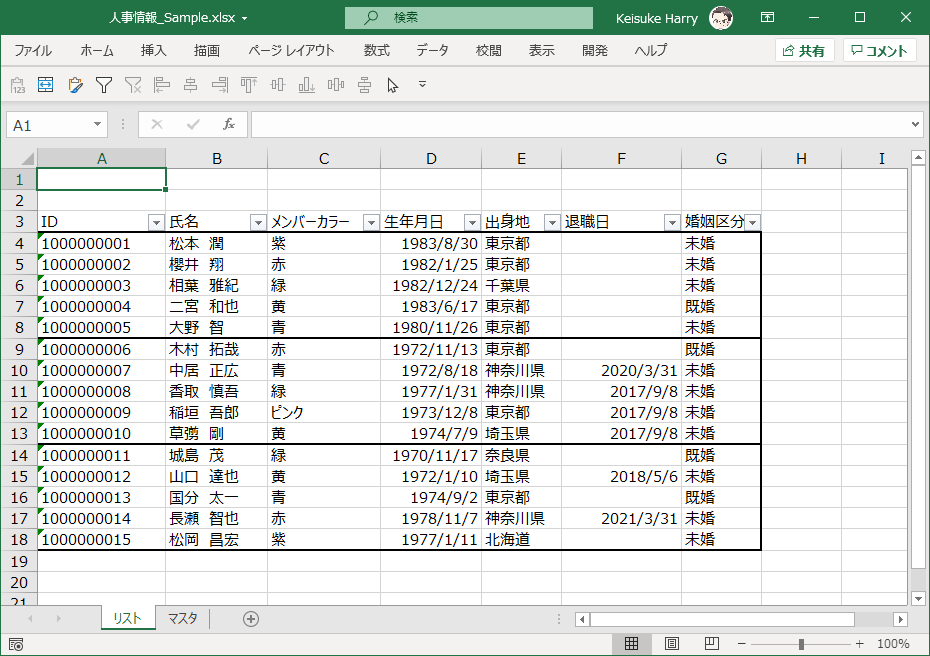
1.Prepare the file to be split
You do not use the tool out of the blue. The first and foremost is to prepare the files to be divided.
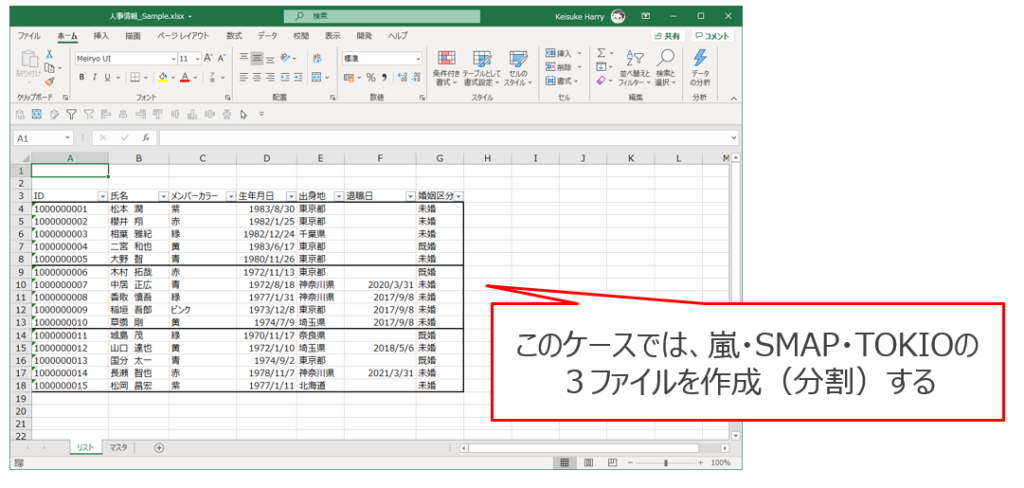
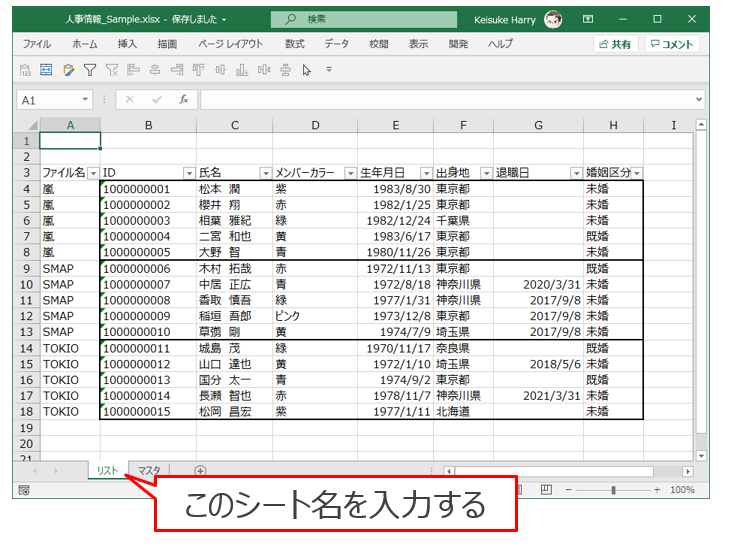
Here, we have prepared Excel files of the members of SMAP, Arashi, and TOKIO. The ruled lines are just for clarity and have nothing to do with the process.
Note that the file references another sheet, the master sheet, but it does not matter if it references another sheet in the division.
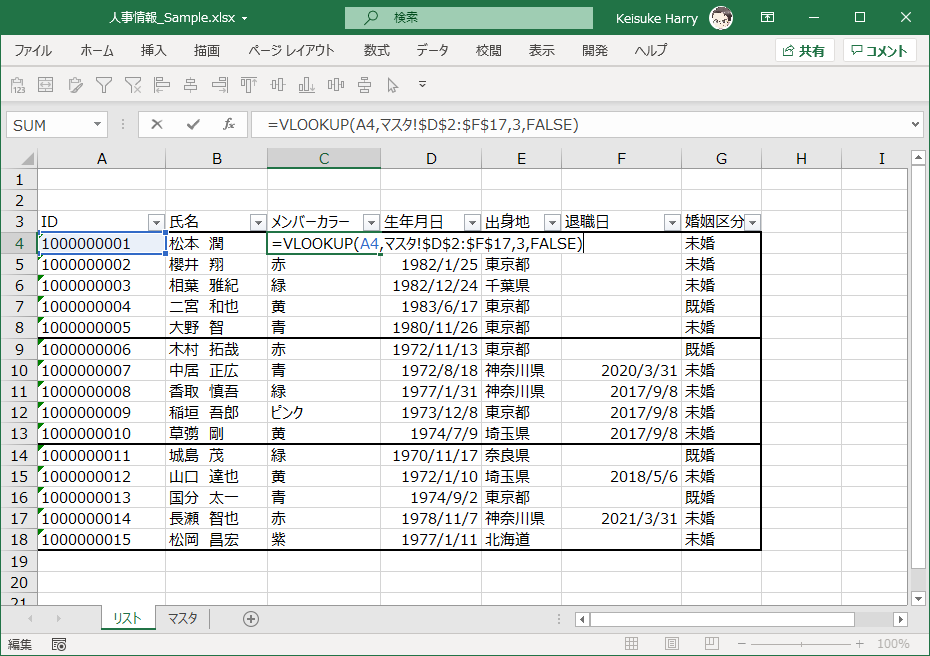
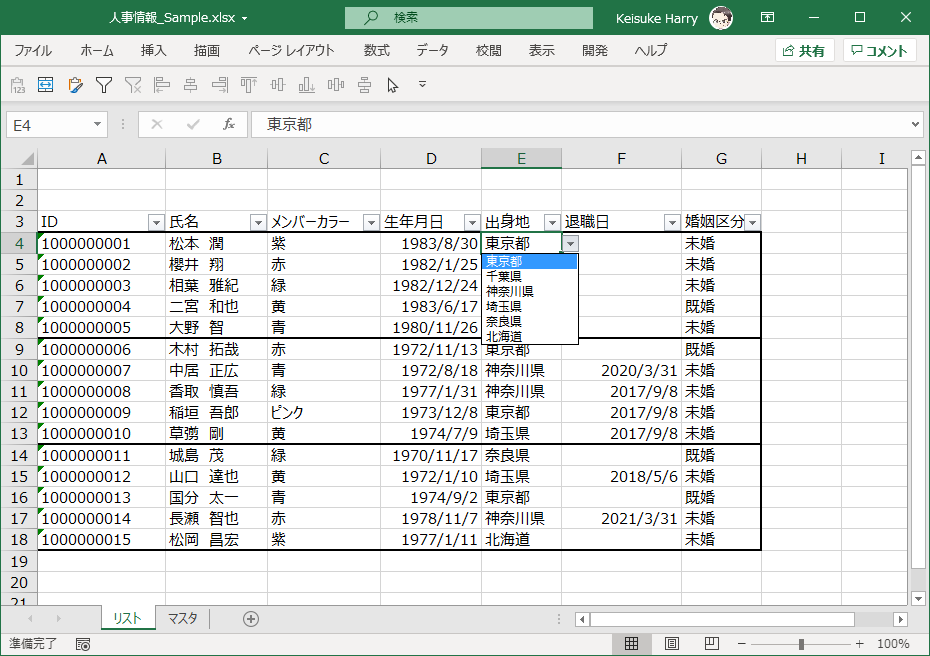
In this sheet, member color is obtained from the master sheet by Vlookup, and hometown is also pulled down from the master sheet by “input rule”.
1.Add “File Name” column to column A
Add a header column called “File Name” in column A. This is actually very important. Please note that if you do not add it, an error will occur.
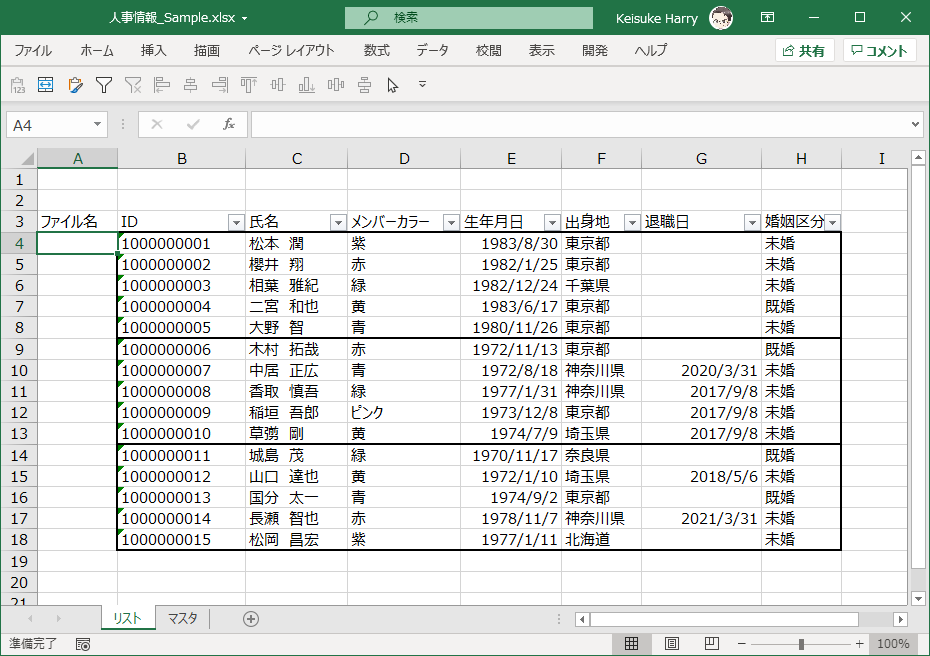
2.Enter the group name (file name after splitting) in column A.
You may enter the file name using the formula (= C4). Be sure to fill in the file name for all lines.
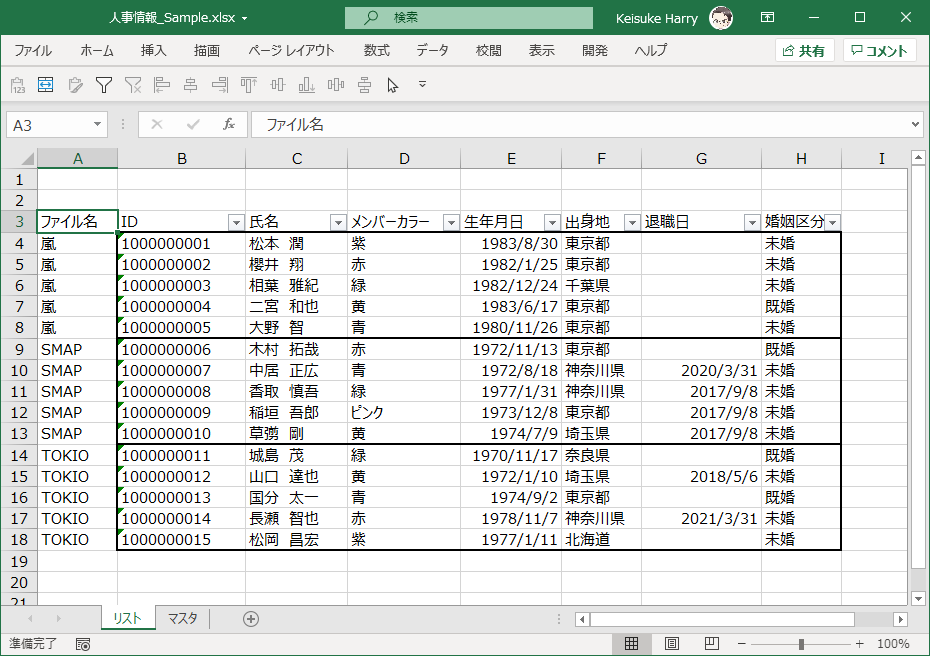
3.Include column A to set the filter
If you look at the above image, you will see that column A was added later, so the filter is not set; please set the filter again, including column A.

You are now ready to go. Save and close the file.
2.Enter the “Original Data File Path” on the Setting sheet
Enter the file path of the file you prepared in 1.
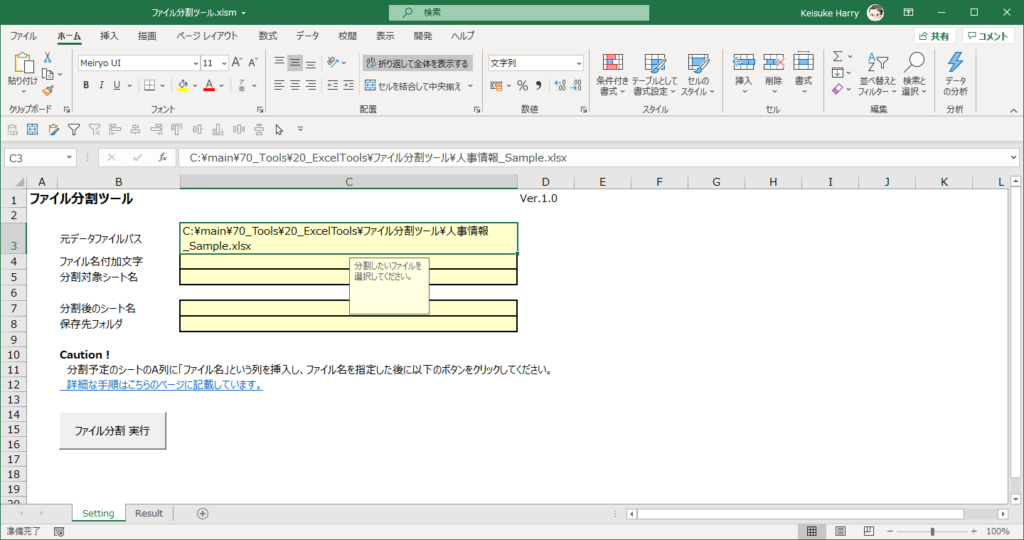
3.Enter the “File appended characters” on the Setting sheet.
Basically, the file name is changed to the file name set in column A in section 1, but if you want to set a common character at the beginning of the file name, enter the character in this cell.

In this example, the character “prefix _” is added to the file name.
4.Enter the “Name of the sheet to be split” for the Setting sheet.
Enter the name of the target sheet in the file prepared in 1.
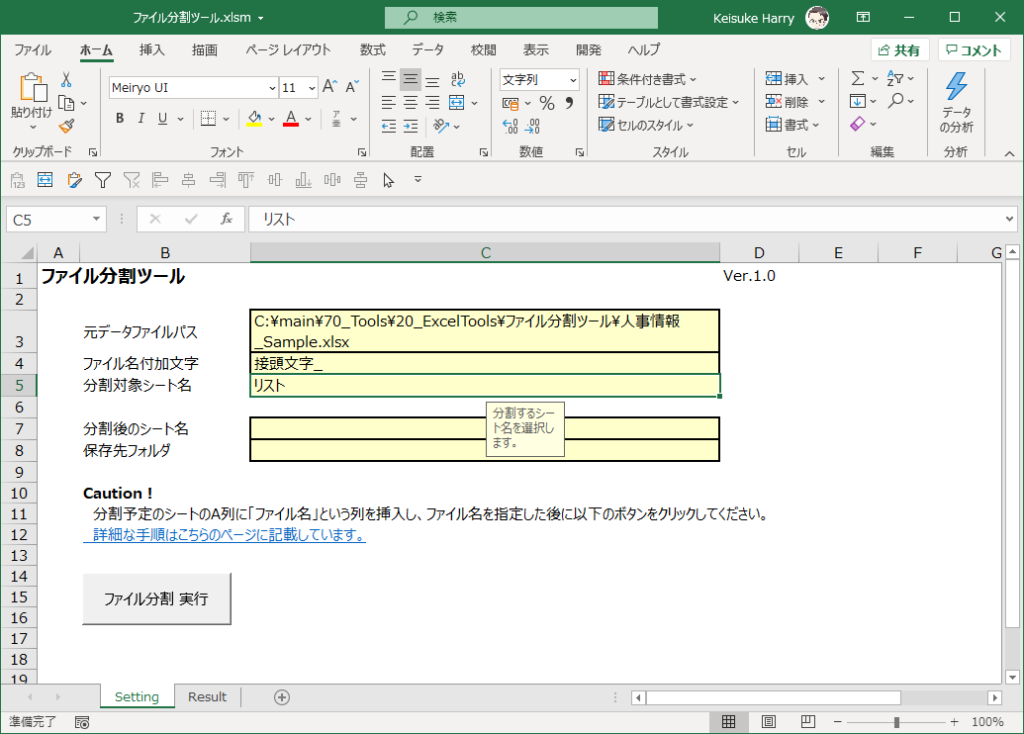
5.Enter the “sheet name after splitting” for the Setting sheet.
In this example, a sheet named “List” is split, but if you want to change the sheet name from “List” after the split, enter text in this cell.
If there is nothing special, blank is fine.
6.Enter the “Destination Folder” for the Setting sheet.
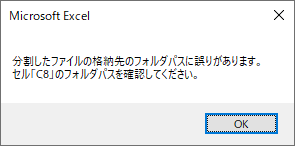
Enter the destination folder path. At this time, the rightmost character of the folder path does not have to be “\”. (This is corrected in the program.) If the destination folder path is incorrect, the following message will appear.
If the destination folder path is incorrect, the following message will be displayed. (from Ver. 1.2)
The setting is complete up to 6.
Now, click the “Execute File Split” button.
8.Check the “Result” sheet.
When completed, the following message will appear
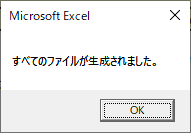
Let’s move on to the Result sheet and check the results.
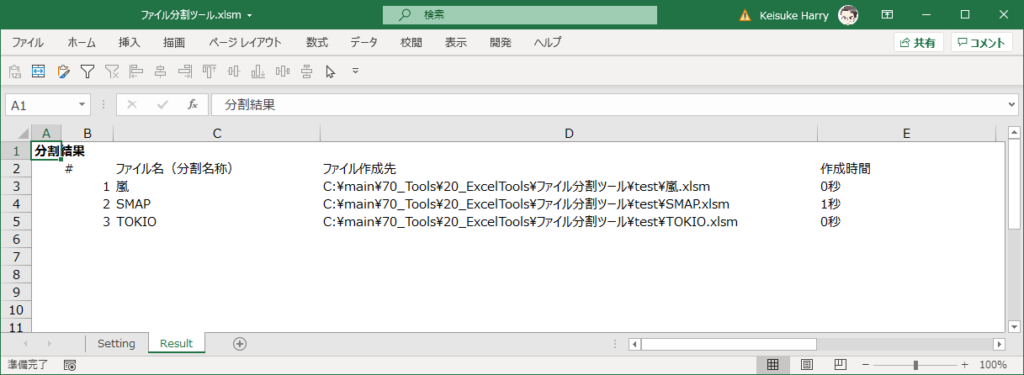
The name of the split file is entered in column C, the file path in column D, and the creation time in column E.
At the end of the last column, you can actually start the split file.
About Options
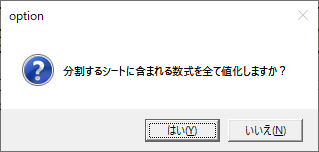
This tool has three options. File Split The following message that appears when you click the Run button.
Here is an explanation of the three options.
1.Paste data in a sheet by value
The first option is value pasting.

If you click “Yes” on this option, all formulas in the sheet to be split will be split after pasting the values.
A common case of using this option is when the original sheet contains a lot of references to other books in Vlookup.
If the data is local to the creator, when other people open the split file, they will not be able to refer to the data, and an extra dialog box will appear.
If you want to avoid this risk, please set this option to “Yes”.
2.Paste data in a sheet by value
The second option is the sharing setting.
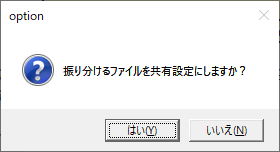
In most cases, you want someone to refer to the split file.
If there is a possibility that more than one person will use the file at that time, this option should be set to “Yes”.
However, unlike in the past, “Share Settings” is no longer a function recommended by Microsoft, so it is not recommended to use this option even though you have created the file, since it may cause the file to move extremely slowly (unexpected movement).
3.Make a book with macros
The last option is the option to set the book with macros.
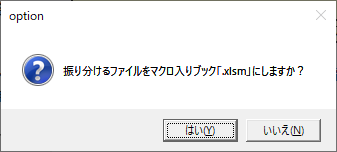
What kind of situation is when you are planting a macro in a book. (As it is…)
I often use this option “Yes” for files that have user-defined functions.
After all, it is a function that I put in to use user-defined functions.
Common Errors
There have been a number of problems that occur after adding the “File Name” column of the file/sheet to be split and forgetting to set the filter.
Please make sure that the filter is set to include the “File Name” column of the header of the sheet to be split.
in the end
There are quite a few situations where a single list is split up and shared when information is provided from HR to each workplace.
For example, once a year, when giving feedback on evaluations, this tool is used to create an Excel file for each workplace.
It is a lot of steps, but once you get used to it, it is a tool that can be used in many situations. Please give it a try.
Update History
| Version | Date | Details of modification |
|---|---|---|
| 1.0 | 2021/02/12 | First edition |
| 1.1 | 2021/02/13 |
|
| 1.2 | 2022/02/27 |
|
| 1.3 | 2023/06/16 | Found error that if input all data as Numerical Value into Column A, “File Name”, the tool cannot work. Fixed this error for ver 1.3. |
